
Video Stabilizer for Panasonic GH1

Summary
This page documents my efforts to acquire a video stabilizer for my Panasonic GH1 camera. This was a three part effort which is shown in 3 sections:
- Reviewing potential options and selecting the stabilizer I felt was best suited for my needs (and budget.)
- Obtaining an update to the selected stabilizer that allowed it to balance properly
- Enhancing the stabilizer by substituting an alternative gimbal
There is probably more detail here than you might want to read, so if you want to get to the end result just go to the final section by clicking here.
1. Selecting a Stabilizer
I first realized I needed a stabilizer after shooting a 360 degree walk-around video at Stonehenge. I included this video in a montage you can see by clicking this text. After looking for a low-cost (around $100) stabilizer I settled on one of these two: Balvanz Enterprises MiniDV Steadicam and the IndieHardware Camcorder Stabilizer. Here are photos of each copied from the manufacturer's websites:
IndieHardware
Balanz Enterprises
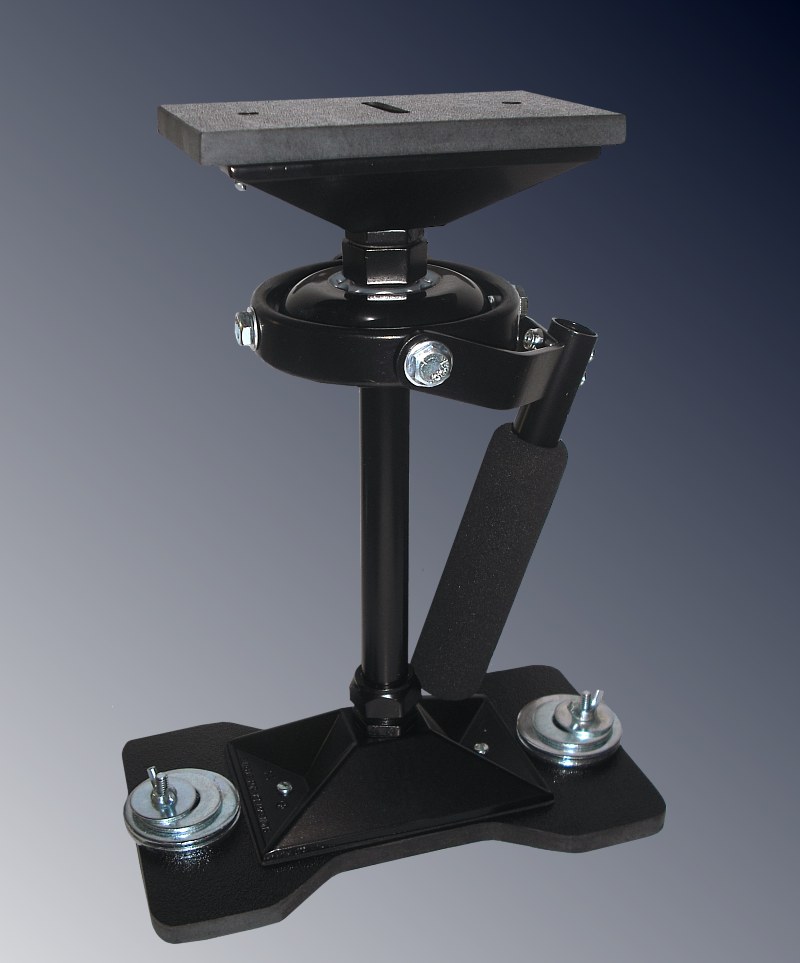
I opted for the IndieHardware stabilizer because it had the handle directly beneath the device's center of gravity and because it would be easier to pack in a suitcase. I purchased the IndieHardware for $104.90 delivered to my door via USPS. It arrived in perfect condition and I proceeded to set it up with my GH1.
Initial Setup
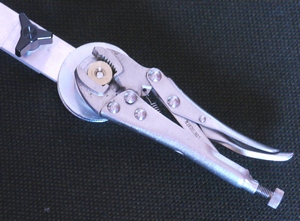
Setting up the stabilizer was fairly simple but I quickly discovered the GH1 was heavier than the stabilizer was able to handle. IndieHardware says the stabilizer will work for any camera up to 2 lbs. in weight, and the GH1 with 14-140 lens is slightly less than this, so I was surprised and disappointed that I was unable to achieve proper balance. I solved the problem temporarily by adding a small Vise-Grip to the rig:
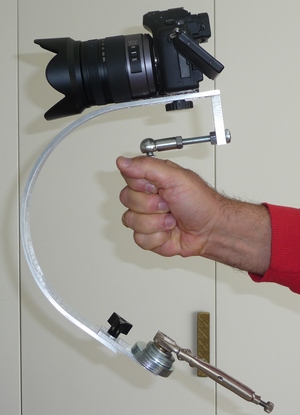
In the above photo I've balanced the camera so it points slightly downward. Of course moving the camera rearward on the stabilizer would let it be level.
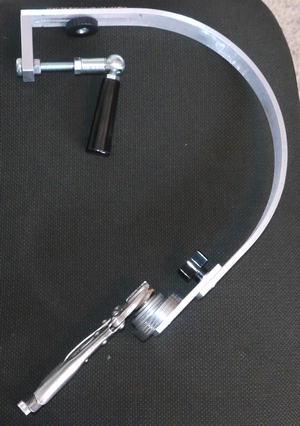
Here are 2 more photos showing my temporary solution to the weight problem:
After discovering this problem I sent the following email to the folks at IndieHardware:
Today I received my stabilizer which I want to use with my Panasonic GH1 still/video camera. The GH1 with lens weighs just under 2 lbs, so I thought your stabilizer would work OK with it.What I found out is that I can only achieve the correct balance by including all the stabilizer weights and by clipping on a small Vise-Grip pliers to the weight knob, with the Vise-Grip handles extending down the length of the balance arm.
This tells me I need either a longer balance arm or heavier weights, or both. So I'm wondering if you can provide me with some heavier weights and/or a longer piece of aluminum to which the weights are attached. I really don't want to return the unit to you, but I also can't use it with the darned Vice-Grip attached.
Thanks.
I received an E-Mail offering me an alternative (longer) weight arm and some additional weights. I used these parts to reassemble the stabilizer as shown in Section 2.
Initial Video Test
Once I was able to achieve proper balance with the Vice-Grip I made this test video:
Click here to view video file (8.3 MB WMV format)
This video is downsized to 512 KBps so it doesn't have great detail; the original MOV file from the camera is 188MB and a bit too large for people to view online.
Considering the low cost of the stabilizer and my total lack of experience with such a device I was fairly pleased with the results. I hope to hear back from IndieHardware soon because a fix for the balance/weight problem should be fairly straightforward. Check back here for future updates.
Other Things I Have Learned
Needless to say as a total novice to video recording I've learned a few things and also discovered a couple of issues with the IndieHardware stabilizer.
1. Camera placement on the stabilizer is very critical. Moving the camera just a small amount (1/8") makes a huge difference in the overall setup.
2. Believe it or not, zooming the lens with the camera on the stabilizer is enough of a weight change (actually, change to the center of gravity) that the camera will dip or rise as the lens gets longer or shorter.
3. The Panasonic camera strap is light weight but tends to get in the way of the stabilizer. So I took it off. For serious videographers this is no doubt the way to go, but I switch from stills to video a lot and need the strap. So it looks like I'll have to get one of those light-weight removable ones that have extra quick-release clips near the camera body.
4. The key component to any stabilizer is the joint that allows the handle to freely swivel while supporting the camera and stabilizer. Professional stabilizers use ball-bearings for this joint because they provide minimal friction. Low-cost stabilizers like the IndieHardware use a simply ball & socket joint. Here are 2 close-ups of the joint itself:
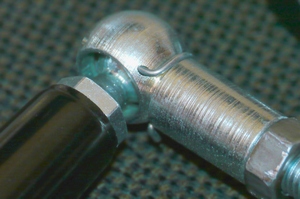
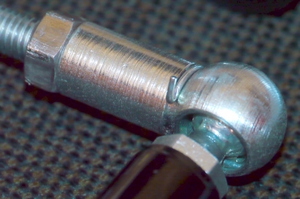
The left photo shows the joint with the wire clip that extends through the socket; this clip keeps the ball (handle) from coming out of the socket. The right photo shows the opposite side of the joint; note how the end of the wire clip points up. This strikes me as a potential safety hazard because the end is fairly sharp.
5. I found this component which looks like it would make a better choice for the joint: http://www.mcmaster.com/#catalog/116/1176/=5flqjs. It's not quite clear yet how this could be attached to the top part of the IndieHardware device, but I'm working on that.
2. Updated Weight Balance Parts
After reporting the above experience to IndieHardware I got a nice reply saying they were redesigning the weight balance parts and would mail them to me ASAP. I got the package yesterday (19 Nov 2009.) Here's a photo of the new (top) and old (bottom) parts side by side:
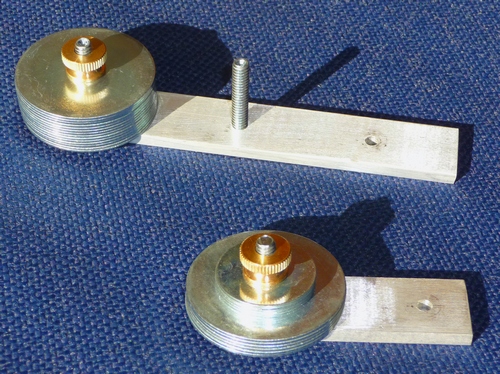
As you can see the new unit is longer, has 2 points for attaching the weights, and has more weights included. I found that 14 weights placed at the far end of the weight arm was the right amount to balance the GH1 properly so I removed the inboard screw you see above.
Here's a photo of the updated stabilizer with my GH1 attached. The entire setup weighs 3 1/2 lbs. so the stabilizer and weights add about a 24 oz. (1 1/2 lbs.) to the weight of the camera.
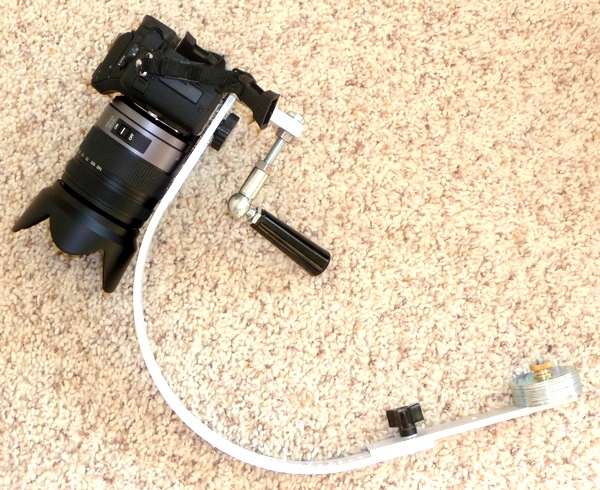
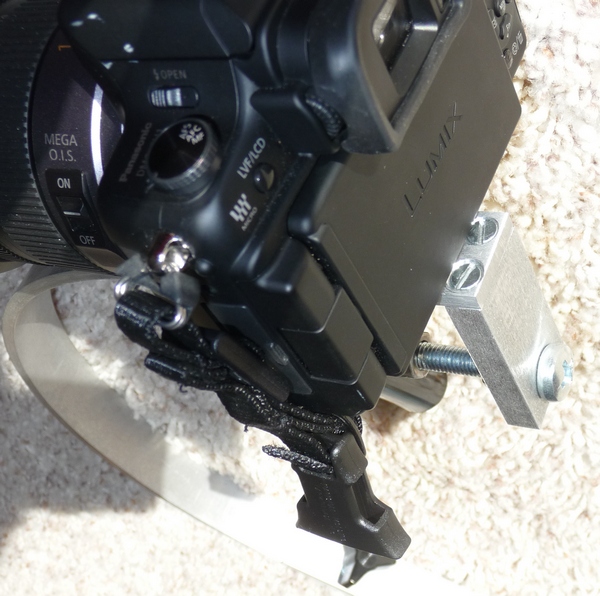
To achieve proper balance I changed the position of the handle and ball joint assembly by moving it as close as possible to the vertical support piece. This is simple to do; just unscrew the locking nut at the base of the ball joint and screw the ball joint in as far as it will go. But in order for the handle to clear the camera support bar as you turn it, it is necessary to take out one of the 2 screws attaching the vertical bar to the camera support, loosen the other one, and twist the support to provide clearance for the handle. Here is a picture of the 2 screws:
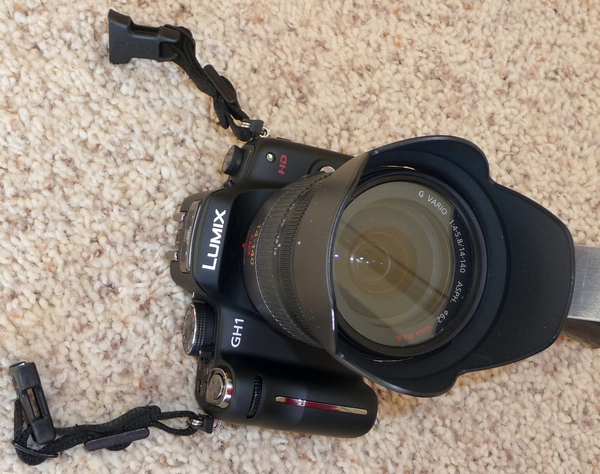
Another change from Phase 1 was to replace the standard Panasonic neck strap with one that has quick-disconnect clips. This makes it easy to get the strap off the camera so its not in the way when using the stabilizer. One of the quick disconnect clips is shown above; here's a shot of both:
Second Video Test
Click the start button below to start the video. I imbedded this video directly into the page so to view it you may have to install a plug-in. The video is 6.3MB and as before I down-rezzed it to 512K BPS to reduce the file size.
Since I will be using the stabilizer for strictly amateur purposes I am quite confident it will work OK for me. One of my key requirements was that the stabilizer be easy to pack in a 22" suitcase and the IndieHardware unit fits this need nicely.
I plan to add some sort of quick-release camera mount between the camera and the stabilizer. As noted earlier, the placement of the camera on the stabilizer is critical, and since I switch from stills to video and back I don't want to spend the time re-adjusting the camera on the stabilizer each time. A quick-release unit would resolve this since the base would be permanently attached to the stabilizer.
As noted in point 5 at the end of Section 1 I have been investigating alternatives for the simple ball joint used in the IndieHardware stabilizer. The ball joint seems to work fine but my intuition tells me that a device with roller or ball bearings might be better. The unit I referenced in point 5 above uses a teflon sleeve as the bearing/rotating surface and when my Mechanical Engineer son looked at this he felt it would have too much "stiction" to be free moving. IndieHardware had the same feeling so I found this device which has a real ball bearing rotator: ball bearing rod end
I received the Aurora Bearing Co. CM-8 Rod end and immediately realized I'd need some different parts to substitute it for the original IndieHardware gimbal. Here is a close-up picture of the rod end:
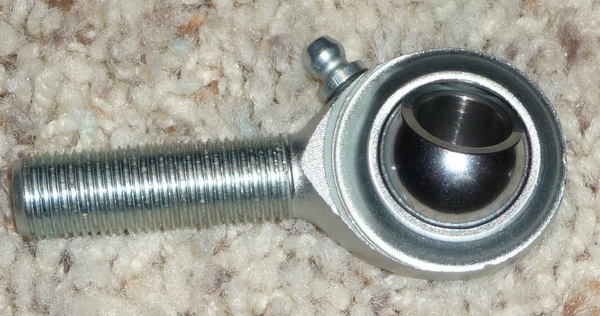
There were 2 problems with this part: (1) the center hole is 1/2" diameter and thus larger than the bolt used to attach it to the stabilizer, and (2) the threaded end of the CM-8 is 1/2" fine thread which did not fit the IndieHardware handle or any other handle I had. So it took a couple of trips to Lowes hardware dept. and a lucky find to resolve these problems. Here are 2 pictures of the final result I came up with:
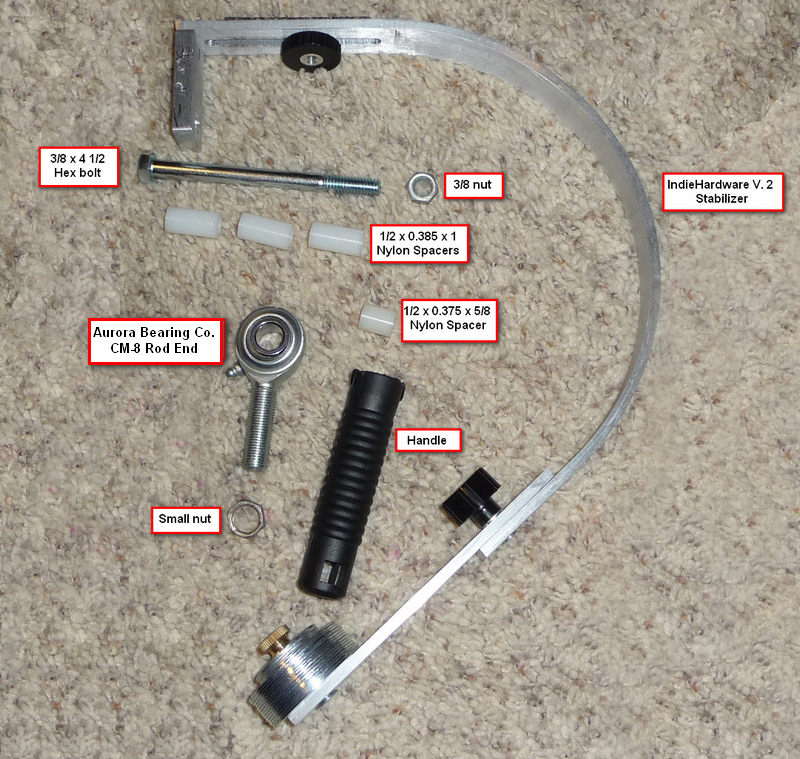
To attach the CM-8 to the stabilizer I got a 1/2 x 0.375 x 5/8 nylon spacer to put inside the CM-8's rotating ball. This spacer fits perfectly and is the right diameter for a 3/8" bolt. I experimented with several different 3/8" bolt lengths and found the best length to use was 4 1/2" since this put the handle directly in line with the stabilizer's center of gravity.
Because the 4 1/2" bolt was so long I needed three 1/2 x 0.385 x 1 spacers for the handle attachment. These spacers have a slightly larger outside diameter than the one inside the CM-8 and this difference is critical. It allows the spacer closest to the CM-8 to press tightly against the rotating ball instead of sliding through it. Luckily Lowes has a wide variety of these nylon spacers and I had little trouble finding the right parts. The spacers come in packages of 2 and sell for about $1.00 per package.
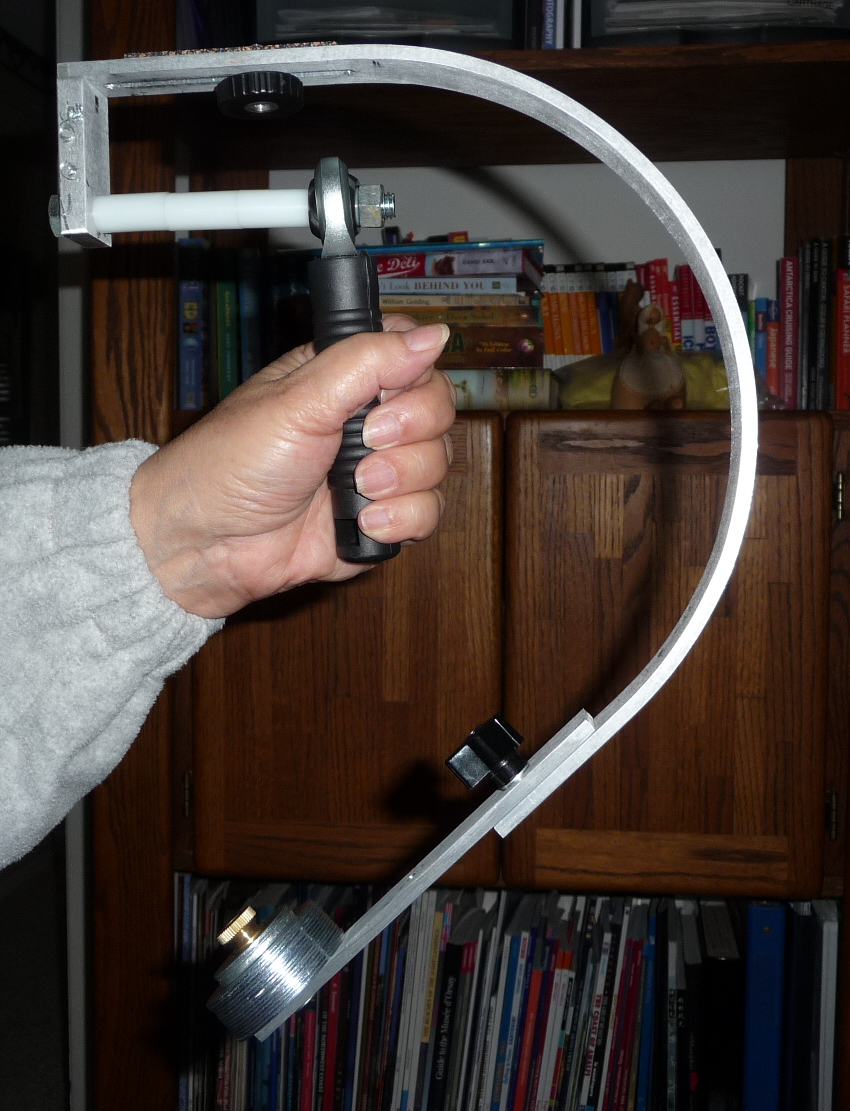
Finding a suitable handle to attach to the 1/2"
threaded end of the CM-8 was a real problem. Most 1/2" parts have a
coarse thread but the CM-8 has a fine thread. I was unable to find any handle that could fit this thread
and the threaded end itself is too short and small to use as a handle.
As luck would have it one day I was out running and passed by a house
that was discarding some stuff at the curb. One item was a broken
extension squeegee and I saw it had a handle that appeared to be the
right size, so I stopped and pulled it off the squeegee and brought it
home. The hole in the handle was larger than the 1/2" end of the
CM-8 so
I found a small nut to thread onto the CM-8 and simply pushed the handle
over it. This is not ideal but seems to work well enough until I can
find a better solution.
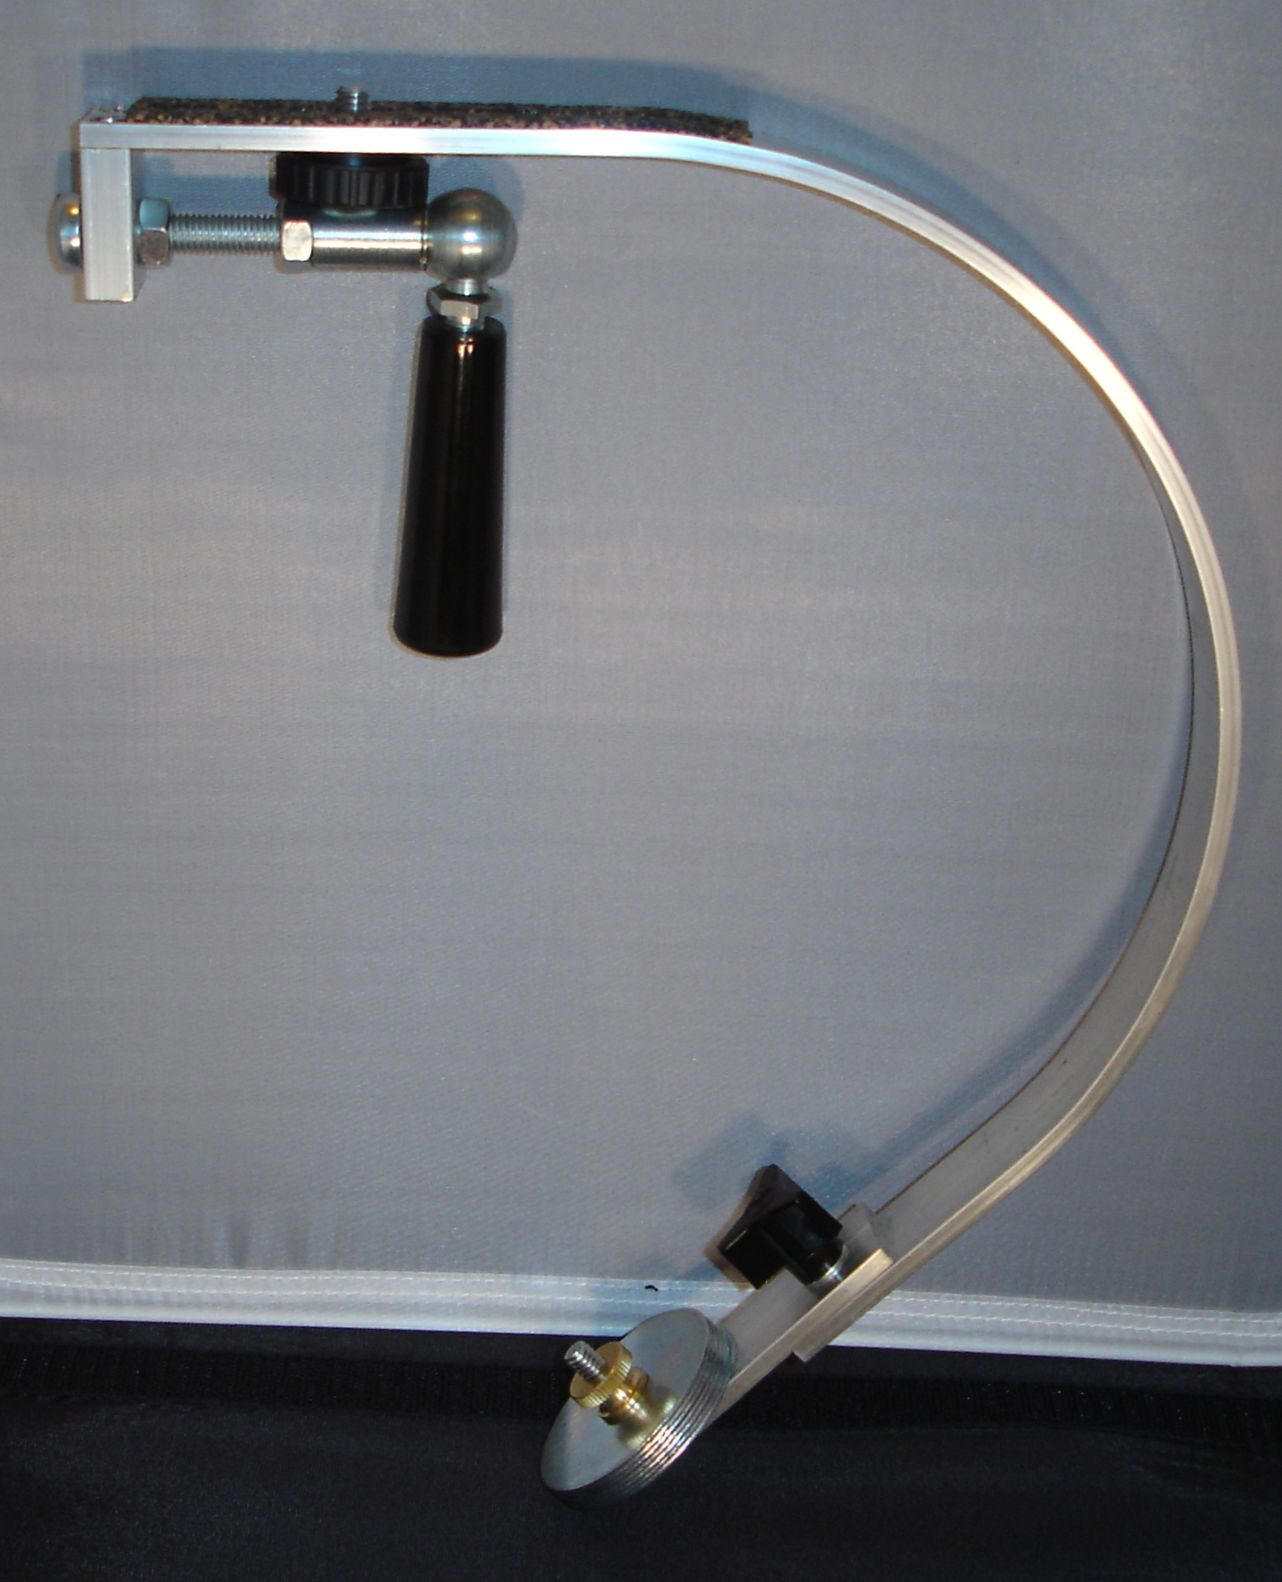
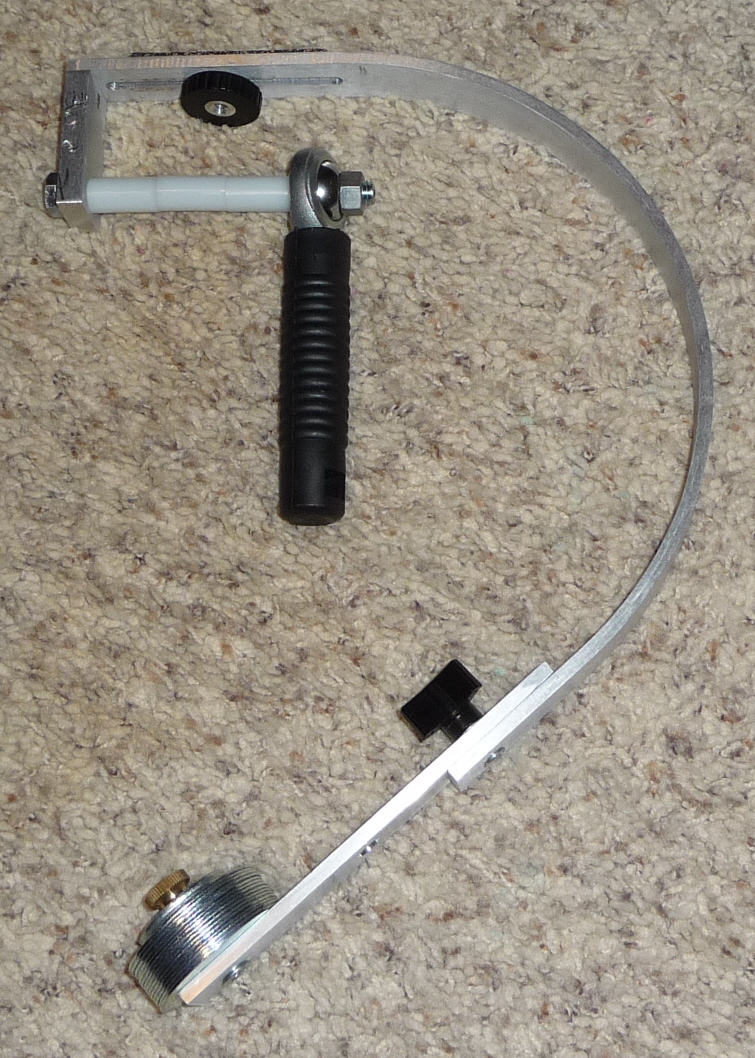
Here is a picture of the assembled stabilizer without the GH-1 on it.
Notice that the stabilizer alone assumes the proper orientation.
I haven't included any videos taken with the final version because they
look no different. The longer bolt used to attach the CM-8 to the
stabilizer allows the handle and support point to be farther forward,
and this gives a bit more latitude with positioning the camera.